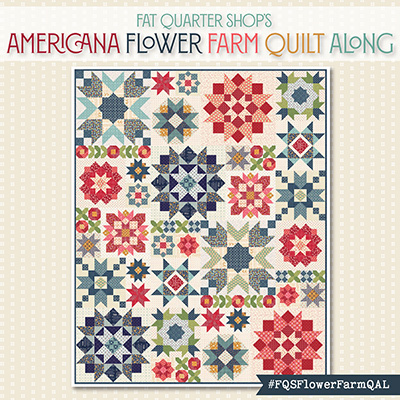
Hooray! My first Quilt-A-Long is complete. Finished. Done! The final winner of the grand prize was @kaylynowens! It took us two months, six steps with six awesome prizes (and a whole lot of prep time that lead up to this series) and so far we have three completed quilt tops. by kaylynowens, cristinalovescrafts and quiltsintexas

I totally loved seeing your progress and being able to reward you with a little quilters’ loot. It made my heart sing so thank you very much! All of the prizes have been shipped. The last two where shipped this week so you should be getting them soon. Your different color variations were inspiring. If you missed out on the Quilt-A-Long but wanted to make the quilt, here is a list of all of the steps.
SCHEDULE
PICKING YOUR FABRICS
CUTTING AND SEWING STRIPS
MAKING YOUR BLOCKS
ADDING CAPS
ADDING SASHING
If you post pictures on Instagram use #therugquiltalong. I would love nothing more than to see what you made using this drawn out tutorial. I could have done it in one post. But no prizes?? What would be the fun in that.
As I stated at the beginning of the Quilt-A-Long, you have extra blocks, so today we are going to think of ways you can use them to make other items. What can you make with these extra 14.25” blocks? The possibilities are endless…
• Pillow
• Tote bag
• Table runner
• Mini quilt
• Placemats
• Makeup bag
• Cat bed
• Baby quilt
• Quilt top or quilt back with a new design
• Table top quilt
I tend to go wild on my quilt backs. It is a place where I don’t allow patterns. I play with my limits and work as I go… on the fly. I take photos as I work so I can make informed decisions on what looks better. It is freeing to work without a pattern. My way to skirt on the edge of improvisational quilting.
I am addicted to big blocks as will as extra blocks. When you have extra blocks, you can create something unique and fun in less time. You already have the hard part done, the blocks. So you can use them as focal points to create interest, so now all you have to do is add to the blocks to complete the project to achieve the desired size. Today I challenge you to make something with your extra blocks. You can use what I share with you today or you can create something absolutely different. On February 14 I will pick a new winner from the time frame of today until Valentine’s Day. I don’t have a prize yet but I will share that with you in a later post.
Let’s go over the most important things we implemented in the Quilt-A-Long that might help in this challenge.
- We used 3” sashing all over because that is the same size of squares we pieced into the block. Adding uniformly and creating a nice flow.
- Sashing between blocks is 14.25”, the same size of the height of the block.
- When sashing rows together, start with the longer sized row. Add the sashing to that side. Trim off sashing following the edge of the quilt angles. Then add the next row.
These are just a few thing to keep in mind but they are not things that you have to do.


First of all, I would like you to see this baby quilt top. I added sashing between two blocks. Ironed flat. Repeat. Then I added sashing between the two rows. Ironed flat. Added a 3” border. Ironed flat. Then I sewed various sized strips to one side of the square. Ironed flat and trimmed the edges with the finished quilt in mind. Then I repeated on the other three sides. And bam!! You have an easy baby quilt top. You can also add large white triangles to the four sides to turn it into a square quilt.


Now let’s make a whole, fairly large quilt top. We will make a strip of vertical blocks. A focal line that will only use four blocks. We will cut five 14.25” squares of white. Cut four of these squares in half and one in quarters. Cut seven white stripes 3” high. From that, cut seven 14.25” x 3” rectangles. Add a strip to the top and bottom of each block for all four blocks. Add a half white square to the other side of the 14.25” strip. Repeat two times. Add another half white square to the other side of the 14.25” strip. Repeat once. Add a quartered white square to the other side of the 14.25” strip. Repeat once. Add sashing in between each row. Then add the rows together to form one large strip. Trim down edges of the quilt strip. Add yards of fabric to one side of the strip. Fun, easy project that you can finish in one to two days.

You can even do a Traditional Granny Square Quilt top. I wanted to get the quilt bellow finished before today but I only have the blocks and the design. I hope you will take this challenge and I can’t wait to see what you make with your extra blocks. If you have any questions or want help with quilt math just send me a message I we can figure it out.


